* Review the safety data sheets for each of your molding and casting materials. * Make and compare test casts with each of them. * Compare printing vs milling molds. (refer to Our Group Page)
Individual Assignment
* Design a mould around the process you'll be using, produce it with a smooth surface finish that does not show the production process, and use it to cast parts.
checklist
☑ Linked to the group assignment page and reflected on your individual page what you have learned. ☑ Reviewed the safety data sheets for each of your moulding and casting materials, then made and compared test casts with each of them. ☑ Documented how you designed and created your 3D mould, including machine settings. ☑ Ensured your mould has smooth surface finish, that does not show the production process (by postprocessing if necessary). ☑ Shown how you safely made your mould and cast the parts. ☑ Described problems and how you fixed them. ☑ Included your design files and ‘hero shot’ of the mould and the final object.
GROUP ASSIGNMENT REFLECTION
My Fab Academy partner, Florimond Chu, and I had the opportunity to work with various molding and casting materials, including resin, silicone, and plastic, using both 3D printing and machining techniques to create either positive parts or negative molds. Through the hands-on experience, we gained valuable skills and knowledge in mixing two-part compounds and properly pouring them into molds. We’re especially grateful to FabLab alumnus - Zi Hon, whose guidance was instrumental in helping us navigate the process smoothly. Without his support, we would likely have struggled with handling the materials, especially in terms of measuring the correct ratios for mixing.
INDIVIDUAL ASSIGNMENT
After experiencing the challenging steps involved in creating a mold before casting the final product, I decided to design a relatively small mold to produce rubber-like buttons in two different sizes, which could be useful for my final project. Following the basic principles of molding and casting, the process generally follows one of two workflows: • A hard positive mold leads to a soft negative mold, which is then used to cast a hard positive final product, or • A hard negative mold is used directly to cast a soft positive final product.
Make A Mold
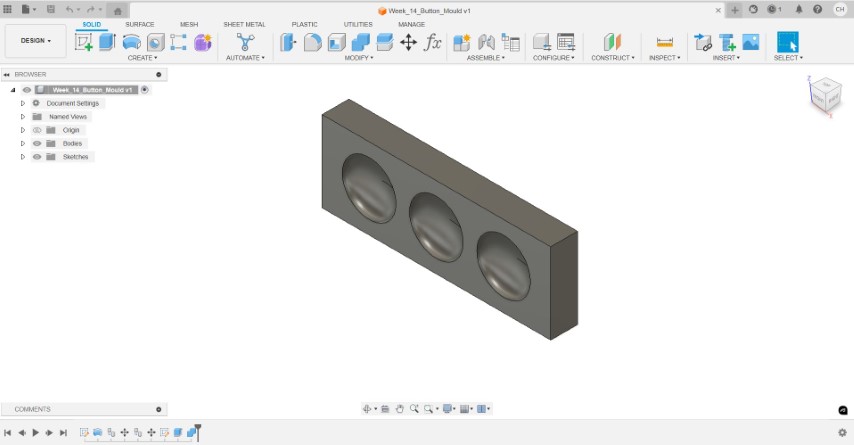
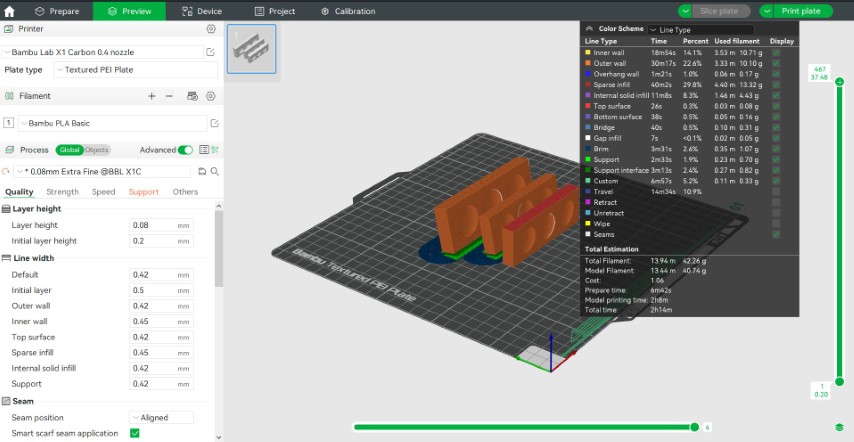
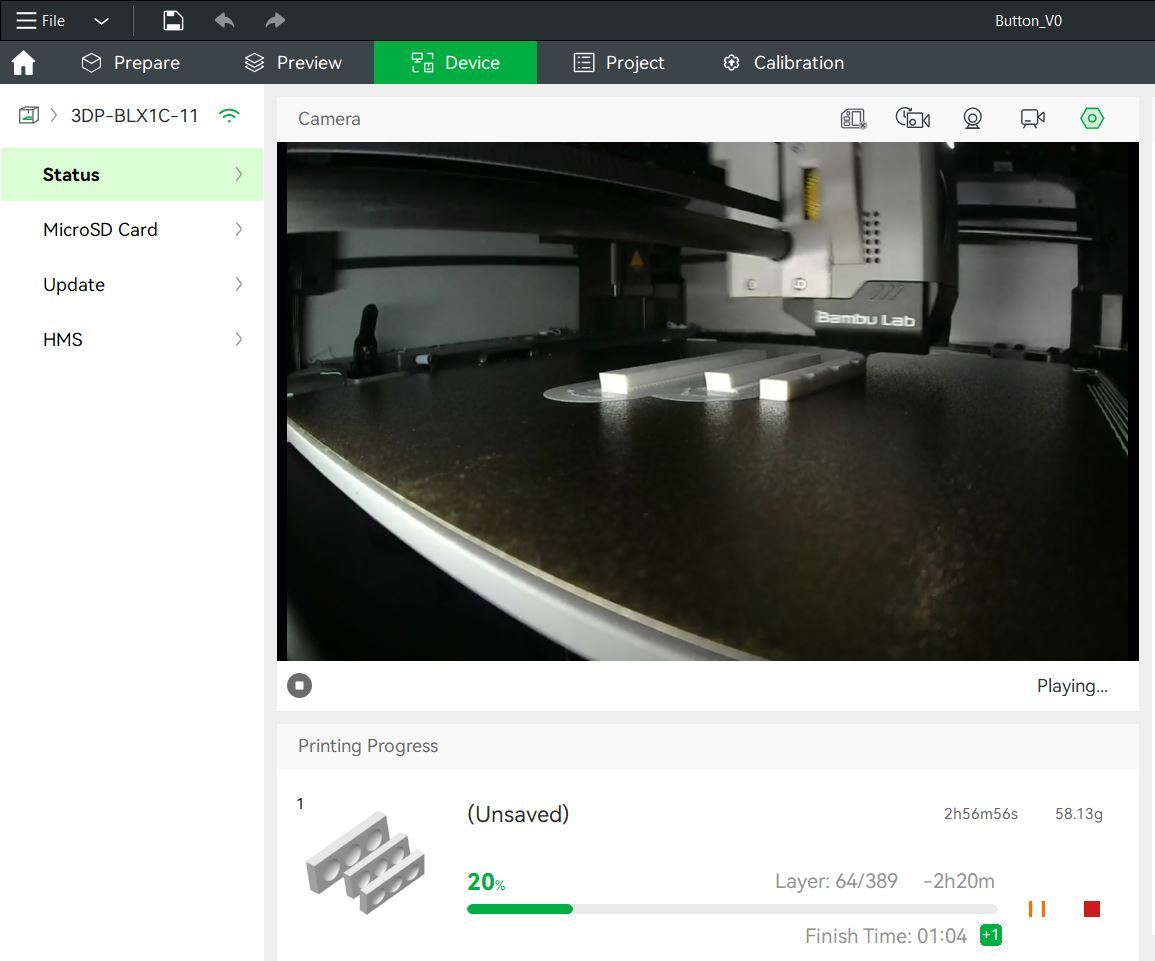
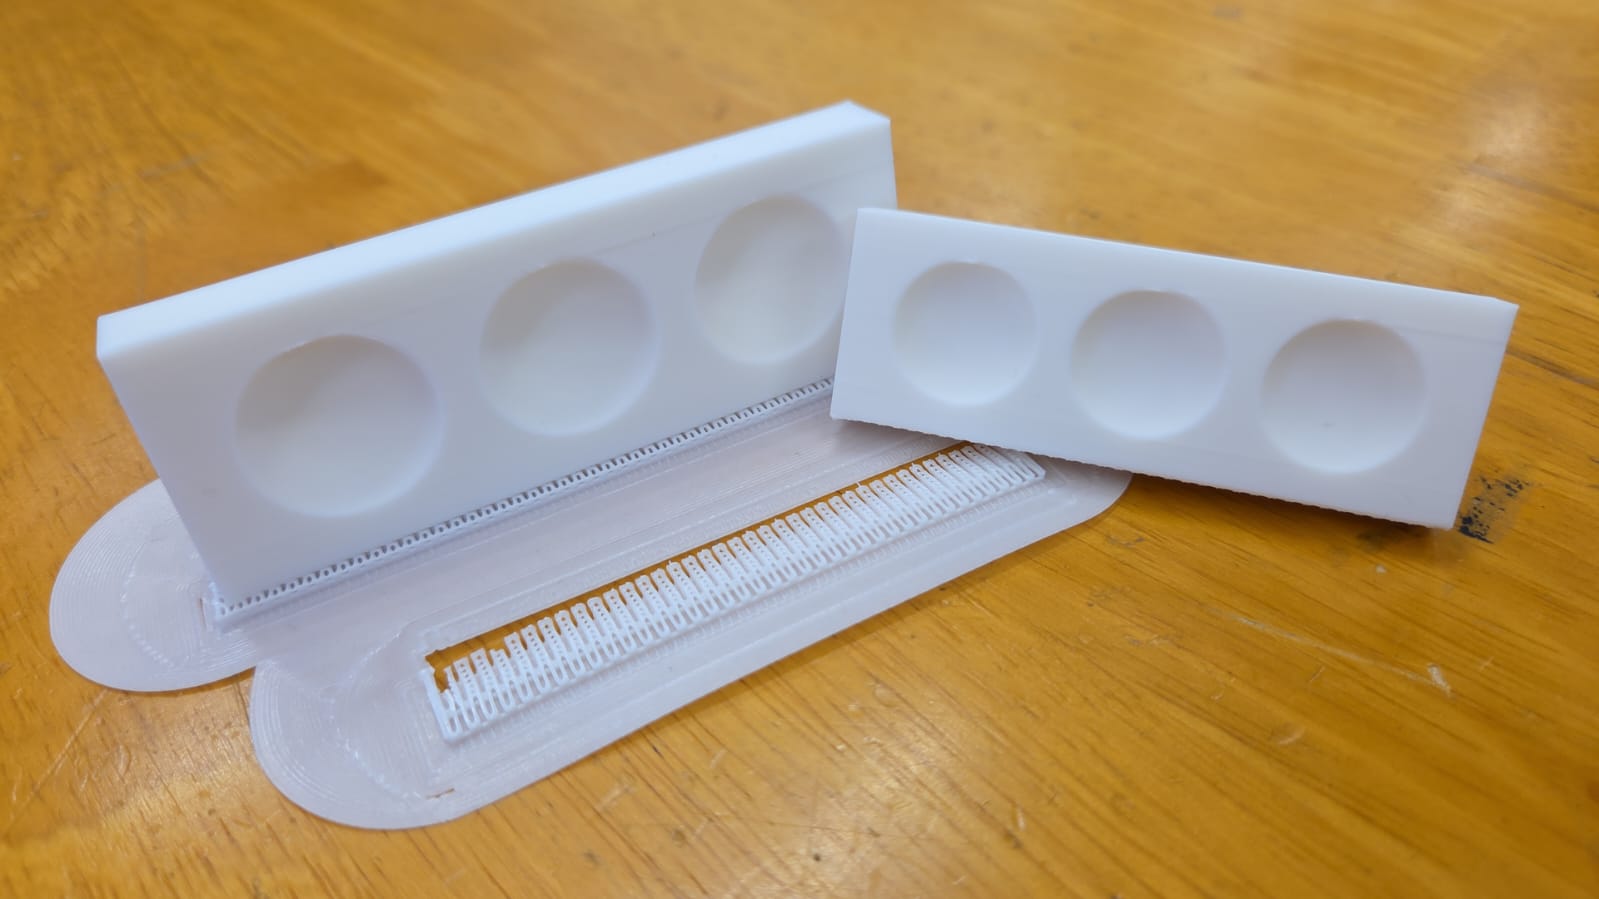
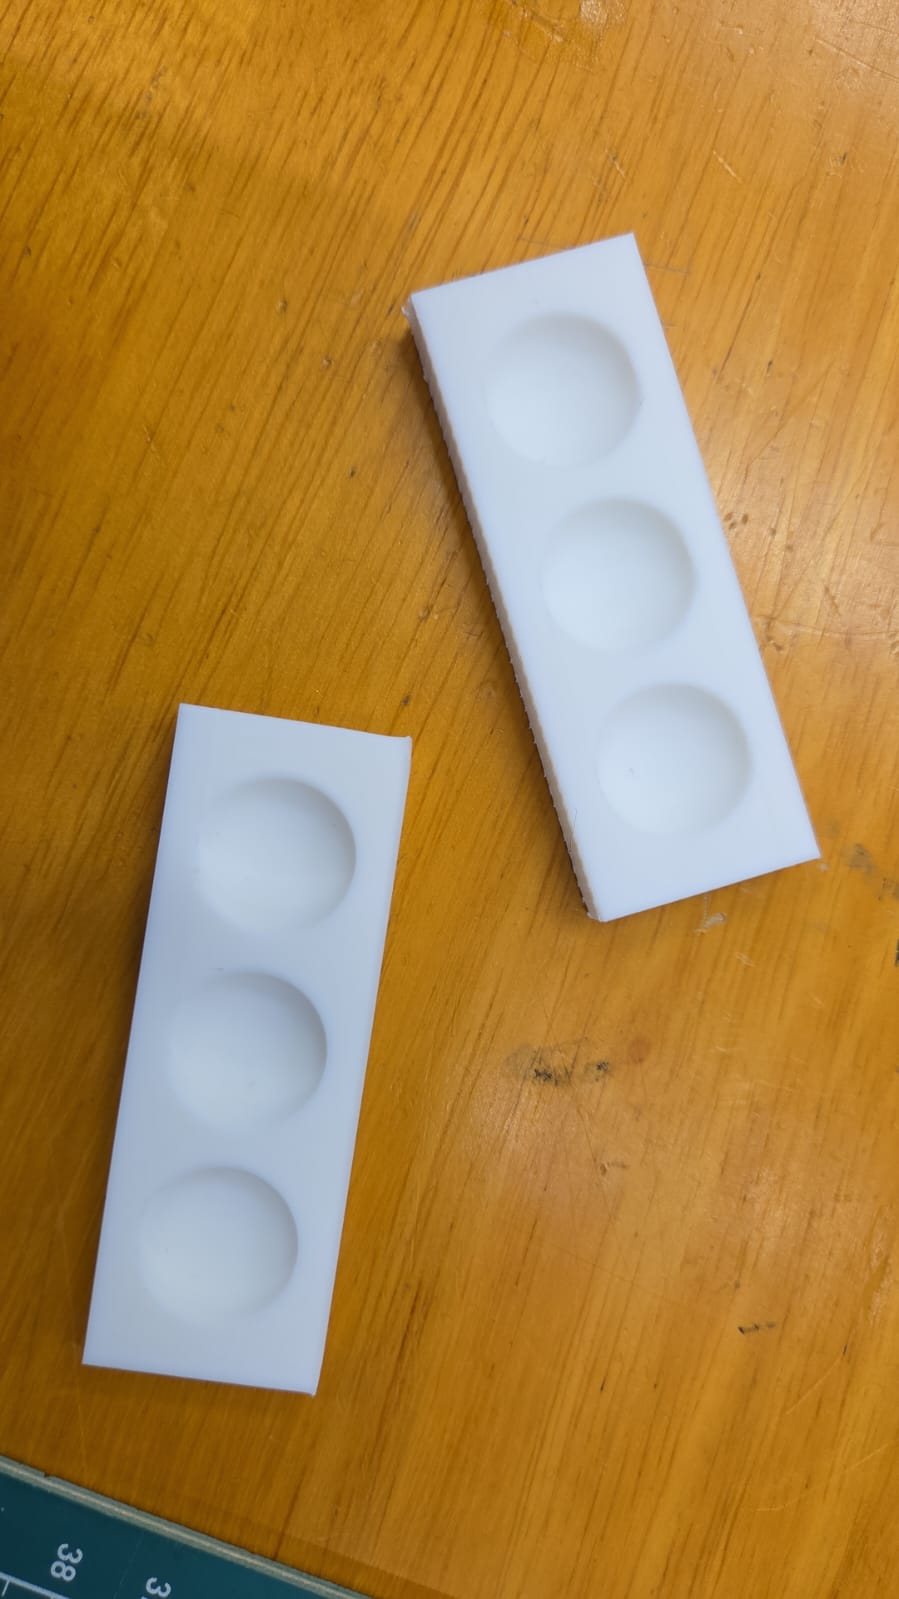
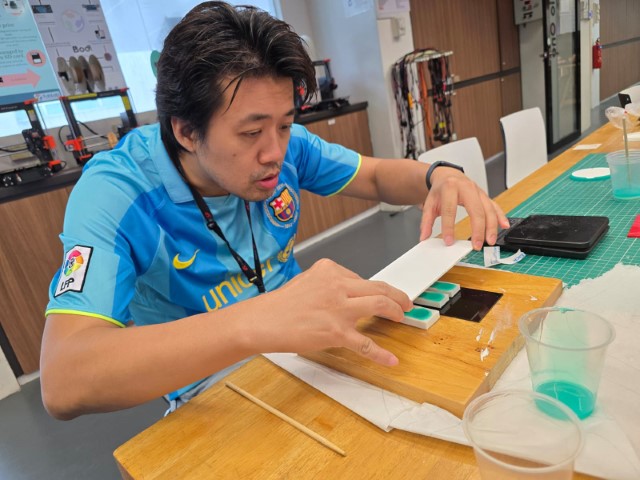
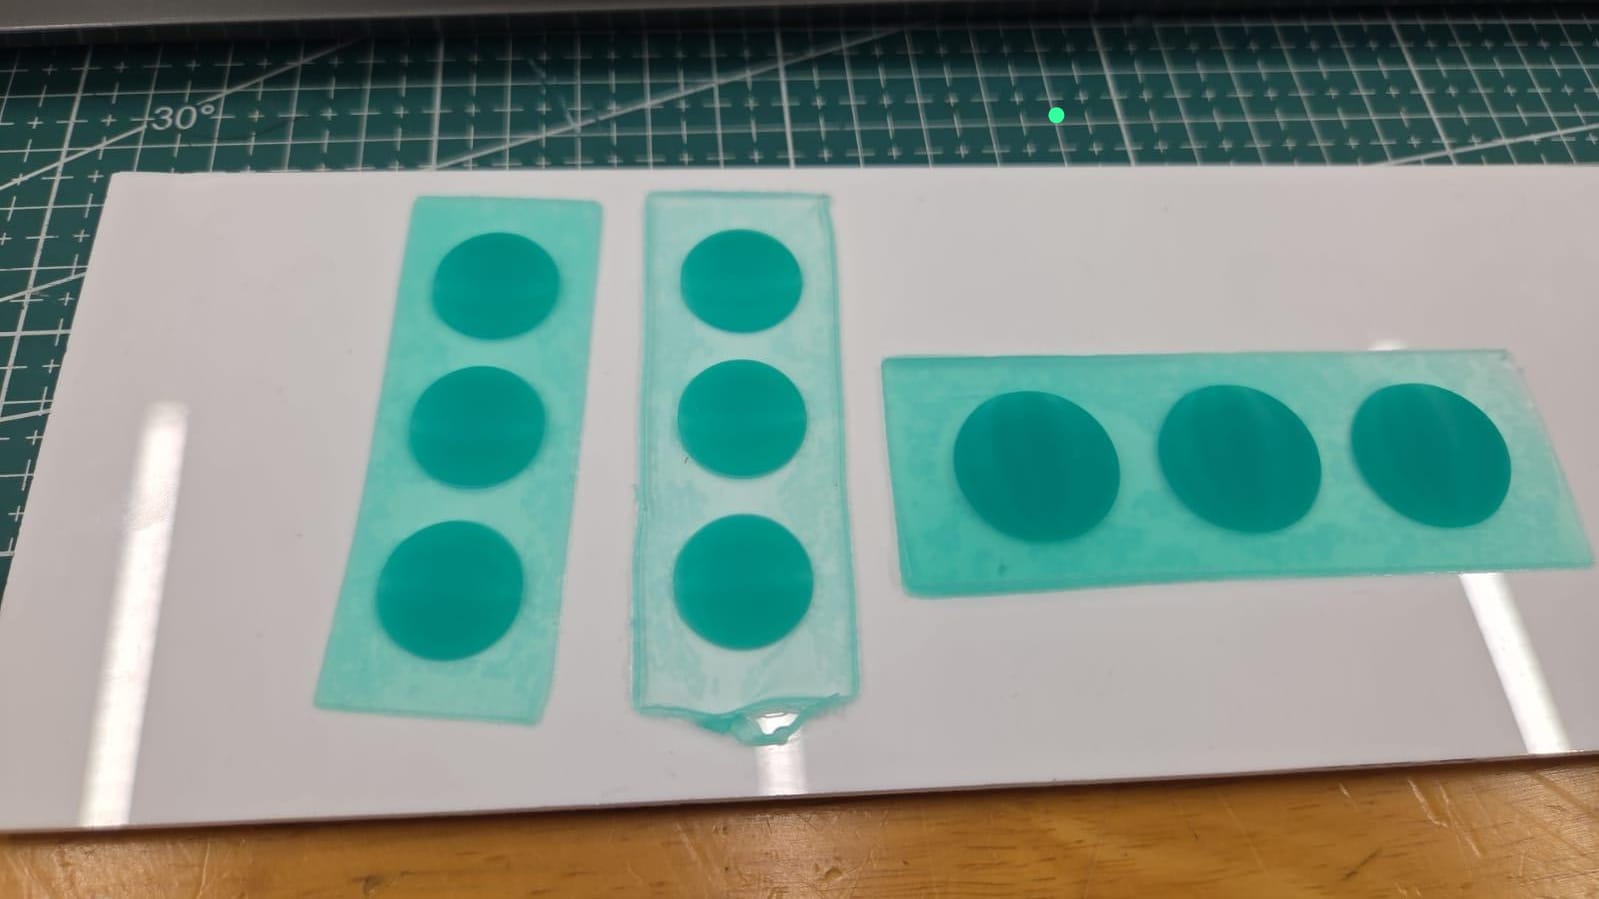
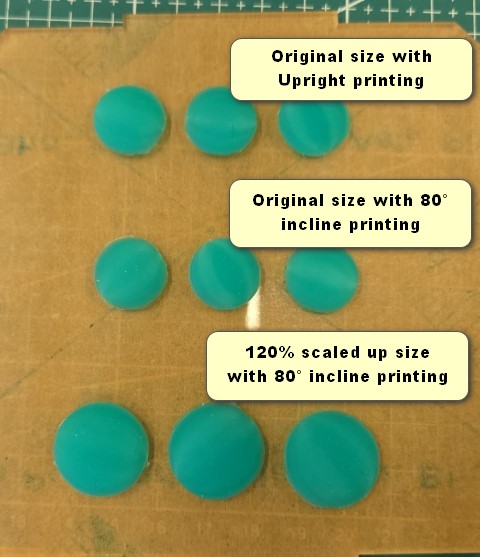
Starting the molding process with a hard mold is essential, and this can be created either through 3D printing or CNC machining. Since I plan to cast rubbery buttons, I designed a CAD model of a hard negative mold block featuring three hemisphere-shaped buttons arranged side by side. I chose 3D printing over CNC machining because I'm more familiar with the process and today's 3D printers offer excellent quality — often comparable to machined molds. Please refer to Our Group Page for casting results between 3D-printed and machining molds. To achieve high surface detail, I selected the EXTRA FINE 0.08 mm layer height pre-set on the BambuLab X1C, minimizing visible layer lines on the printed mold. Additionally, I created three versions of the mold: one printed upright at original scale, one printed at an 80° incline, and a third scaled up to 120% and printed at the same inclined angle. This setup allows me to compare casting results across different orientations and sizes.. Photos below show the print out of each mold based on different setups: Before starting the casting process, I secured all three molds onto a thick wooden block using blue tack to prevent them from shifting during movement or while curing.
Casting A Part
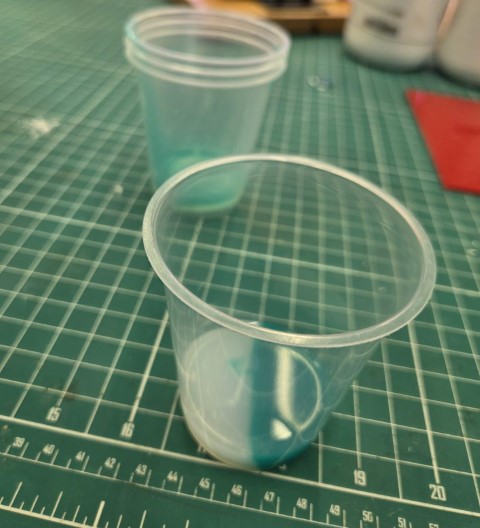
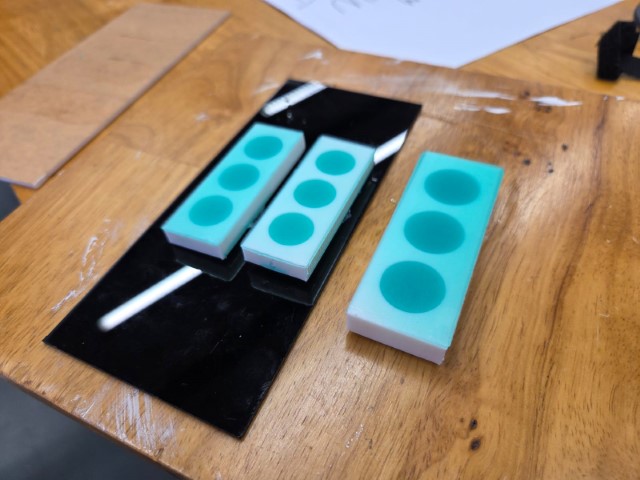
I used BBDINO Super Elastic Liquid Silicone to cast my soft positive final part (refer to my group assignment for the material datasheet - Pot time = 30 minutes). After calculating the correct combined amount of Compound A and Compound B for my button casts (as shown in the left photo), I thoroughly mixed the two for about 5–10 minutes, then placed the mixture into a vacuum chamber for degassing (as seen in the right video). Although the silicone has self-degassing properties, I ensured that all visible bubbles were removed before carefully and slowly pouring the mixture into the three prepared mold blocks. To help achieve a clean and flat finish, I placed a 3mm-thick acrylic sheet over the moulds and allowed the silicone to cure for 5–6 hours. After 5 – 6 hours of curing time, I removed the acrylic cover and gently demoulded the silicone buttons from the 3D-printed molds. The result: a successful casting of soft silicone buttons. From here, depending on the size of my final project, I have some simple soft-jelly button cover to use for my push button switches.
Reflection
It was an enjoyable week experimenting with the molding process using various materials. Unfortunately, due to added work commitments and falling ill, it took me nearly an extra week to complete both the individual and group assignments with my Fab Academy partner, Florimond Chu. Additionally, we were not fully prepared with the necessary casting materials, as some of the available batches appeared to have aged from prolonged storage. Despite these setbacks, we still had a great time exploring the mold-making and casting process, producing both rigid and flexible final products.